
Why Choose Kunli TIG Welding for Precision and Control
Article Directory
- 1 What Does TIG Welding Actually Solve for Fabricators and Hobbyists?
- 2 How Does TIG Compare to MIG and Stick?
- 3 Why Does Consumable and Wire Quality Shape Every TIG Outcome?
- 4 What Equipment and Setup Do You Need to Begin TIG Welding?
- 5 Which Techniques and Habits Produce Consistent TIG Beads?
- 6 How Do You Diagnose and Fix Common TIG Defects?
- 7 What Should You Check Before Buying TIG Wire and Consumables?
- 8 Can You See These Principles in Real Fabrication Scenarios?
- 9 A Practical Checklist to Act on Before Your Next Weld
Walk into most working fabrication shops today and you will notice something: welders who built their careers on wire-feed processes are quietly adding a TIG torch to the bench. Not because MIG stopped working, but because certain jobs demand something more. Tighter joints. Cleaner surfaces. Welds that hold up under a dye-penetrant test without hours of grinding beforehand. That shift in practice is real, and it brings consumables into the conversation fast — because when joint quality matters enough to change your process, the grade and handling of Aluminum TIG Wire becomes as consequential as the machine settings themselves. What follows covers the territory a working fabricator actually needs: what TIG reliably solves, where it falls short compared to other processes, how to set up a functional rig from scratch, and what to look for when buying filler wire and consumables. No broad industry commentary. Just the practical framework.
What Does TIG Welding Actually Solve for Fabricators and Hobbyists?
The honest answer is that TIG does not solve every fabrication problem. But on a specific class of jobs, it removes friction that other processes leave behind. Arc control, for one thing. The ability to modulate amperage in real time through a foot pedal while the torch stays steady in one hand is something MIG simply cannot replicate. On thin-gauge stainless or aluminum, that live heat adjustment is the difference between a clean bead and a burn-through. The tungsten electrode stays non-consumable in the torch, leaving the filler hand free to feed at whatever rate the puddle calls for. Heat and fill stay independent.
The inert shielding from high-purity argon also matters more than people expect. Spatter drops close to zero when technique is sound. The weld zone stays clean. And because the heat-affected zone stays narrow, distortion on tight assemblies stays manageable. Below are the materials and situations where TIG consistently outperforms alternatives:
- Stainless steel — food-grade tanks, medical enclosures, process equipment where corrosion resistance cannot be negotiated away
- Aluminum alloys — bicycle frames, aerospace brackets, any structure where weight matters and post-weld cosmetics are inspected
- Copper and copper alloys — heat exchangers, electrical components, prototype work where conductivity and joint integrity both count
- Thin-gauge steel — sheet metal fabrication where burn-through risk with MIG makes the job difficult
The payoff in practice: fewer grinding cycles, lower porosity counts when cleanliness is maintained, and welds that pass visual checks without remediation. Not a small thing when rework costs time and material.
How Does TIG Compare to MIG and Stick?
The comparison only becomes useful when it is specific. Broad claims about which process is better ignore the question that actually matters: better for what job, under what conditions? The table below lays out the relevant dimensions without softening the tradeoffs.
| Factor | TIG | MIG | Stick (SMAW) |
|---|---|---|---|
| Arc Control | High — foot pedal adjusts heat in real time | Moderate — wire feed drives heat | Low — fixed electrode |
| Deposition Rate | Slower — operator feeds filler by hand | Faster — continuous wire feed | Moderate — electrode melts in |
| Spatter | Near zero when technique is correct | Some spatter, especially at higher voltages | Noticeable spatter common |
| Learning Curve | Steep — both hands and a foot pedal | Moderate — one hand operation possible | Easier entry point for new welders |
| Thin Materials | Handles very thin gauges cleanly | Risk of burn-through on thin gauge | Not suited for thin gauge work |
| Portability | Requires gas supply, less portable | Requires gas or flux-core setup | Highly portable, no gas needed |
| Ideal Applications | Stainless, aluminum, copper alloys, precision parts | Production steel fabrication, structural work | Field repair, outdoor, heavy steel |
TIG gives up deposition rate and portability to gain control and finish quality. That is a reasonable trade on precision work. It is a poor trade on structural steel in a field environment, or on any job where throughput drives cost. The learning curve, too, deserves candor. Coordinating a foot pedal, a torch hand, and a filler hand while maintaining arc length takes time to internalize. Many welders find they can run a usable bead on thin stainless within a handful of practice sessions. Aluminum on AC takes longer because the puddle moves differently and the balance control adds another variable.
A useful decision rule: if a job requires the weld to look as good as it holds, TIG is likely the right answer. If the weld will be hidden, ground, or painted, and cycle time matters, MIG probably serves better. Stick has its place too — outdoors, on heavy steel, away from a gas supply.
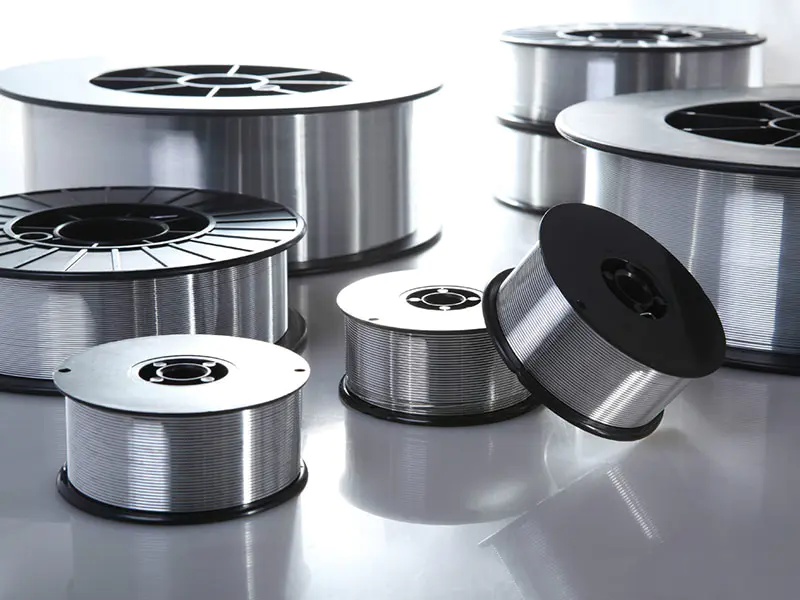
Why Does Consumable and Wire Quality Shape Every TIG Outcome?
Here is something that gets underweighted in most TIG discussions: the filler wire is not a passive material. In TIG, the operator feeds it by hand at a rate they control, dipping into the front edge of the puddle at intervals. That means any variability in the wire — chemistry deviation, surface oxidation, diameter inconsistency — feeds directly into the weld pool. The machine cannot compensate for it. The operator, at best, can only partially compensate through technique.
The metallurgical reasons come down to a few things worth understanding:
- Composition tolerances in the ER designation formula determine whether the deposited metal carries the right alloying elements for the base metal. Small chemistry deviations can change solidification behavior and raise hot-cracking risk.
- Surface oxidation from poor storage or handling introduces oxygen into the arc zone. The result shows up as porosity — small voids that weaken the joint and fail penetrant inspection.
- Diameter variation, even within a few hundredths of a millimeter, affects how evenly the wire melts into the puddle. Tight tolerance means predictable dip volume and consistent bead geometry.
- Spool packaging is easy to overlook and often the first thing cut in price-driven purchasing. Wire that absorbs moisture in transit or storage releases hydrogen into the weld zone — one of the more reliable paths to porosity on aluminum.
When a manufacturer controls diameter and chemistry closely and ships product in sealed, desiccant-packed spools, those variables drop out of the equation. The table below gives a practical checklist for evaluating any wire purchase before committing to a lot.
| Spec Point | What to Check | Why It Matters |
|---|---|---|
| Alloy code / ER designation | Matches base metal chemistry | Prevents cracking and poor fusion |
| Diameter tolerance | Within tight published range | Ensures stable feed and puddle size |
| Surface condition | Clean, dry, no oxidation on spool | Reduces porosity and contamination |
| Spool packaging | Vacuum sealed or sealed bag with desiccant | Protects wire during shipping and storage |
| Chemical certification | Mill cert or test report included | Validates alloy composition as specified |
| Recommended shielding gas | Listed on product data sheet | Ensures arc stability and shielding coverage |
What Equipment and Setup Do You Need to Begin TIG Welding?
TIG requires more peripheral equipment than MIG, and getting the list right from the start prevents a frustrating round of returns and substitutions. Each item below serves a clear purpose — none of it is optional.
- Power source: An AC/DC machine with balance control is necessary if aluminum is on your material list. DC alone handles steel, stainless, and copper alloys. Built-in high-frequency arc start and pulse capability are worth having even if pulse goes unused at first.
- Amperage control: A foot pedal is the standard choice for bench work — it allows real-time current adjustment mid-bead. A fingertip remote on the torch body works better in positions where a pedal is hard to reach.
- Torch: Air-cooled torches handle lower amperages and light-duty cycles without issue. Water-cooled torches are for sustained high-current work where an air-cooled body would overheat.
- Tungsten electrode: Ceriated and lanthanated tungstens handle both AC and DC well and cover most workshop applications. Thoriated tungstens remain common for DC-only work. Match electrode diameter to amperage range and material thickness.
- Gas supply: Straight argon at 99.99 percent purity or higher is the standard for most TIG applications. A quality flow regulator, clean hoses, and a properly fitted collet body prevent contamination that would otherwise introduce porosity.
- Filler wire: Select ER designation to match base material. Store spools sealed with desiccant, and handle wire only with clean gloves — skin oils are enough to cause problems on reactive alloys.
Practical starting points for two common situations: On thin stainless around 1.5 mm, use DC electrode negative, roughly 40 to 60 amps for a 2.4 mm electrode, 15 to 20 CFH argon flow, and a torch angle of about 15 degrees from vertical. On aluminum around 2 mm, switch to AC, shift balance toward electrode-positive to address surface oxide, and expect amperages in the 80 to 120 amp range depending on joint geometry. These are starting ranges, not hard rules — every machine and setup behaves somewhat differently.
Which Techniques and Habits Produce Consistent TIG Beads?
Equipment gets a welder to the arc. Technique determines what comes out of it. A few habits separate repeatable, clean beads from inconsistent work — and most of them come down to consistency in the small things rather than mastery of anything exotic.
Motion and filler dip rhythm:
- Forehand technique, with the torch angled in the direction of travel, is standard for most TIG passes. It keeps the puddle visible and the shielding gas ahead of the heat.
- Dip timing matters more than people expect. Each filler dip should land at the front edge of the puddle and pull back outside the arc cone before the next dip. Rhythm, not speed, is what keeps bead width consistent.
- Arc length control is probably the single habit with the most leverage. Keeping arc length roughly equal to electrode diameter prevents the wandering bead width and inconsistent penetration that frustrates beginners.
Tungsten management is its own discipline:
- On DC, grind the electrode to a tapered point with grind lines running lengthwise. Circular grinding marks generate arc wander. It is a small thing that makes a real difference.
- On AC, allow a small balled tip to form naturally, or start with one already shaped. Grinding to a sharp point for AC work causes erratic balling behavior mid-pass.
- Contact contamination — tungsten touching the puddle or the filler wire — stops the bead immediately. The electrode needs to come out, be cleaned and reground, and the restart happens on fresh base metal.
Heat management is where experienced TIG welders earn their consistency. Stitch welding, short passes with cooling pauses between them, prevents warping on thin parts. Back-stepping, running each stitch in the direction opposite to overall weld progression, distributes heat more evenly across the joint. Pulse TIG, available on machines with that function, alternates between peak and background amperage to reduce average heat input while maintaining puddle wetting — useful on aluminum and thin stainless where heat buildup is the central challenge.
How Do You Diagnose and Fix Common TIG Defects?
Defects in TIG work trace back to a short list of root causes. Learning to read a bead symptom backward to its source saves time and avoids repeated failed passes on good material.
Porosity — small voids visible on the bead surface or in cross-section:
- Gas coverage fails first. Check flow rate, inspect hoses for cracks or loose fittings, and verify the collet body and lens are undamaged and clean.
- Surface contamination runs a close second. Wipe base metal with acetone before welding and handle filler wire with clean gloves. Oil from a bare hand is enough to introduce porosity on reactive alloys.
Tungsten inclusion — gray or white specks embedded in the bead:
Caused by electrode contact with the puddle or filler wire. Stop the pass, remove the electrode, regrind or replace, and restart on unaffected base metal. There is no way to weld through this one.
Lack of fusion — the bead sits on the surface rather than bonding into the joint sidewalls:
Usually amperage too low or travel speed too fast for the joint geometry. Increase amperage gradually, or slow travel speed until the bead wets into both sidewalls fully.
Oxidation and poor surface appearance on aluminum:
AC balance shifted too far toward electrode-negative reduces oxide cleaning action. Adjust balance toward electrode-positive. On enclosed sections, verify back-purge is in place — trapped oxygen discolors root passes reliably.
Heat tint on stainless, the blue-gold oxidation pattern behind the bead:
Indicates too much heat input relative to travel speed. Reduce amperage in small steps or increase travel speed. On multi-pass work, allow more cooling between passes before continuing.
What Should You Check Before Buying TIG Wire and Consumables?
Wire purchasing decisions tend to get made on price and availability, which leaves several important factors unexamined until a defect shows up in production. Choosing the right Aluminum TIG Wire is about more than alloy code — packaging integrity, diameter consistency, and supplier documentation all carry weight. A short checklist run before committing to a lot catches most of those issues in advance.
- Alloy code match: Verify the ER designation against base metal and joint requirements. Substituting a similar code without confirming mechanical and corrosion compatibility is a common source of unexpected failures.
- Diameter selection: Match wire diameter to joint gap and material thickness. Wire that is too large for a tight joint builds excess deposit; wire that is too small requires excessive dip frequency and slows travel speed.
- Spool size and storage: Larger spools reduce unit cost but require sealed storage between uses. If wire sits unsealed in a humid environment, the savings get spent on rework.
- Packaging condition: Look for vacuum-sealed or desiccant-packed spools. Wire that arrives in torn or open packaging may have already absorbed enough moisture to affect weld quality.
- Certifications and test reports: Ask for mill certs or chemical analysis with each lot. A supplier that provides documentation consistently is one worth maintaining a relationship with.
- Sample trial: Before committing to volume, request a sample spool, run a test bead, and evaluate surface quality. If a macro etch is available, run it. The few minutes of testing are far less expensive than a production batch of rejects.
Can You See These Principles in Real Fabrication Scenarios?
Three short cases show how the ideas above connect to actual outcomes.
A frame builder working on thin-wall aluminum bicycle tubing needed to join two 1.8 mm sections at a tight radius without distortion or burn-through. The approach: AC TIG, 2.4 mm lanthanated tungsten, foot pedal for live amperage control, and properly stored Aluminum TIG Wire matched in ER designation to the base alloy. Stitch welding in 15 mm passes with cooling intervals between each kept cumulative heat low enough that the tube geometry held through the full joint. No grinding. The finished join passed visual inspection without remediation.
A small production shop was struggling with heat tint and surface roughness on a stainless bracket that contacted a food-processing stream. Switching to pulsed TIG, reducing peak amperage, and tightening travel speed consistency brought the surface within specification. Back-purging the inner radius removed the discoloration problem at the root. The production run cleared visual inspection without additional finishing.
An engineering team prototyping a copper heat-exchanger component needed a single-pass joint on 3 mm sheet. Copper's high thermal conductivity means the base metal absorbs arc heat aggressively, which demands faster travel speed and higher flow rates than steel or aluminum. A thoriated tungsten on DC electrode negative, a matching ER filler, and elevated argon flow produced a sound bead with acceptable hardness in the heat-affected zone. Settings were documented for the follow-on production run.
A Practical Checklist to Act on Before Your Next Weld
Run through this list before starting any new TIG project, and again when setting up with a new spool of wire. The items that get skipped are usually the ones that show up as defects later.
- Machine setup: Confirm polarity for the material, set starting amperage for joint thickness, check pulse settings if using pulsed TIG.
- Gas supply: Verify cylinder pressure, set flow rate, inspect all hose connections, confirm the collet body is clean and undamaged.
- Tungsten: Select correct type and diameter, grind or ball as appropriate for polarity, check for contamination from the previous session.
- Base metal prep: Clean the weld zone with acetone, remove oxide mechanically on aluminum before solvent cleaning.
- Filler wire: Confirm ER designation, inspect spool condition, handle with clean gloves only.
- Joint fit-up: Check gap consistency along the joint length, tack at intervals to control distortion before running a full pass.
- Practice pass: Run a test bead on scrap that matches the production piece before moving to the actual part.
If the practice bead shows porosity, trace the source before continuing — gas, cleanliness, or wire condition. If fusion is incomplete, address amperage or travel speed on scrap before committing to production material. The time spent on a test piece is almost always faster than the time spent on rework.
A weld that does not need to be fixed afterward is the goal every time. Getting there consistently means treating each variable in the process as worth managing: machine settings, tungsten geometry, base metal cleanliness, and the quality of the wire entering the puddle. Consumable quality is not a peripheral concern — it sits at the center of repeatable results. Sourcing quality Aluminum TIG Wire from a manufacturer that treats wire chemistry, diameter tolerance, and packaging as carefully as you treat your torch angle and travel speed removes one of the most common variables from the process. That kind of manufacturing discipline is what a supplier like Kunli brings to the bench, and it makes a measurable difference in what leaves the shop.
NEXT:What Is Aluminum Alloy Wire and How Does It Differ from Pure Aluminum Wire?


